Stationery 101
Assemble Your Wedding Invitations Like a Pro: Our Expert Tips Revealed

Your big day is on the horizon and the excitement is getting real. But before the wedding bells ring, there’s a crucial task at hand: assembling your wedding invitations. In this blog post, we’re sharing our insider knowledge and expert tips so you can assemble your wedding invitations like the pros. Before we get into it though, it’s worth mentioning that we offer full or partial assembly to all design clients! If you’d rather not worry about how much postage you need or the perfect ratio of envelope-moistener-to-pressure-ratio, don’t worry because we’ve got it down to a science and we’re happy to take it off your plate. For all the DIY girlies out there, read on sis.
Preparation is Key
Before you plan to do your assembly, double-check that you have all the pieces of your invitation order, addressed envelopes, postage, envelope moistener, and any adhesives or supplies you need to assemble the invitation suite. We use this and this most often and order stamps from USPS.com instead of from the local post office to ensure the biggest selection. Don’t forget to buy stamps for the RSVP envelopes as well. Lastly, recruit some help! Family members or bridesmaids are usually the most willing to be of service.
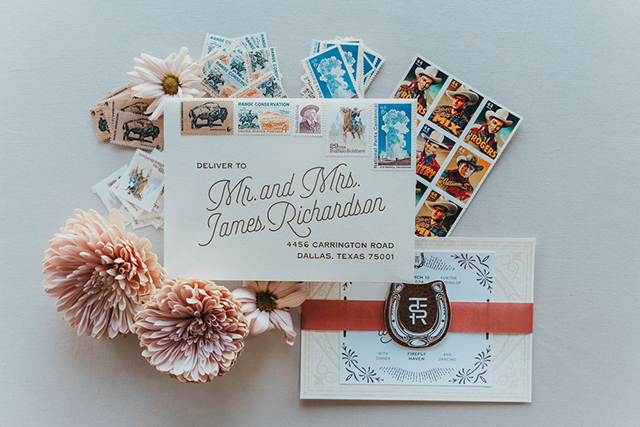
Pro Tip: Before your assembly party, put together an entire suite and take it to the post office. The amount of postage required for your invitation suite will vary based on the weight and you’ll want confirmation that you have enough. Embellishments like wax seals, ribbon, thick paper, square envelopes or vintage postage can affect your postage rate – if they make your envelopes bumpy or too stiff, there is a “non-machinable” charge. While you’re there, it would be a good time to ask if your office will allow hand canceling. If not, you might want to try another office next time!
Organization is Key
On assembly day, get everything organized into stations and assign jobs to helpers. For example, you might have the following: someone to tape bellybands and stack the enclosures inside, someone to stuff and seal the envelopes, and someone to apply postage (more on each job at the end of the post).
Pro Tip – Wash all hands/assembly surfaces and skip the food and drinks, especially wine (and super especially if you plan to lick your envelopes as wine has been known to prevent the adhesive from sticking!) One spill could ruin the whole batch! Nail polish may also rub off on cotton paper, so be mindful of your manicure.
Kindness is, You Guessed it, Also Key
After your suites are all assembled, take them to the post office and hand them to the postal worker instead of dumping them into the bin outside. They’re going to take their fair share of abuse as they go through the delivery process, so you should try to avoid any additional mishandling to start with.
Pro Tip – Alwayssss be nice to the postal workers, especially if you’re about to ask them to go above and beyond for some reason, like hand canceling. If you’ve never heard of hand canceling, it’s a process of marking (canceling) the stamps by hand instead of by running them through the machine that also prints an unsightly barcode on them. Wait for a time when the office isn’t as busy, and even then, offer to do the job yourself instead of putting more work on them. Sometimes they’ll hand over the stamp and you can spend as much time on it as you like, which also allows you to do a neater job than they would probably do. Our local post office allows us to hand cancel, but there are some that will not. If you run into a situation where you’re told it’s not possible, try another post office! Or honestly, you might get a different answer from a different worker on another day.
The Specifics
Stacking the Enclosures
Place the RSVP card under the flap of its envelope so the card is face up and the addressed side of the envelope is face down. Stack the enclosures face-up in order of size, with the largest piece on the bottom.
Stuffing the Envelope
If you’re using an inner envelope, place it inside the mailing envelope with the guest names facing the open side of the envelope. Place the invitation and inserts in the envelope so that they are right-side-up when pulled out with your right hand.
Sealing the Envelope
Inner envelopes don’t have adhesive on the flap and therefore should be left unsealed. Use envelope moistener to activate the glue on the mailing envelope flap. You can use a damp sponge or saliva, but make sure not to over-wet the adhesive. Press down firmly to seal or place the envelope under a heavy book. If your envelopes don’t want to stay closed, try using double-sided tape or a glue stick.
And now your invitations are assembled, stuffed, sealed, and ready to mail! Still have questions? Get in touch – happy to help.
Experience the Anna Howe Design difference
If you feel overwhelmed by the task of wedding invitations, we have good news: we’re here to help! With so much already on your plate in the wedding planning process, we exist to take the stress of design, timeline, etiquette, and production of your save the dates, invitations, and day-of paper goods off the table. AHD clients get one-on-one access to a designer to hold your hand through every step of the process as well as unlimited proofs until every single detail is perfect! If this sounds like something you’d be into, we’d love to hear from you! Fill out the form here to get started today!
Ready to work together on your dream invitations?
The first step is to fill out the inquiry form. You’ll get a no-strings-attached estimate back within 3 business days!